
In Word, you can automate frequently used tasks by creating and running macros. A macro is a series of commands and instructions that you group together as a single command to accomplish a task automatically.
To save time on tasks you do often, bundle the steps into a macro. First, you record the macro. Then you can run the macro by clicking a button on the Quick Access Toolbar or pressing a combination of keys. It depends on how you set it up.
Record a macro with a button
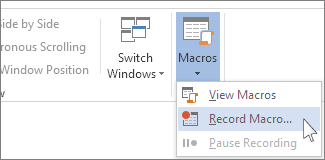
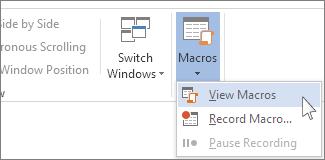
- Click View > Macros > Record Macro.
- Type a name for the macro.
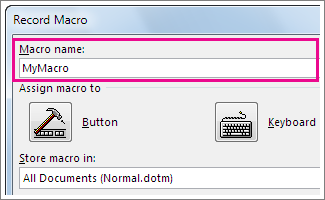
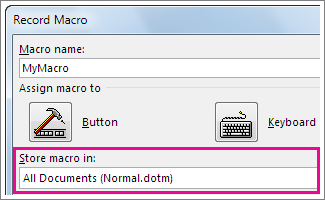
- To use this macro in any new documents you make, be sure the Store macro in box says All Documents (Normal.dotm).
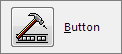
- To run your macro when you click a button, click Button.
- Click the new macro (it’s named something like Normal.NewMacros.<your macro name>), and click Add.
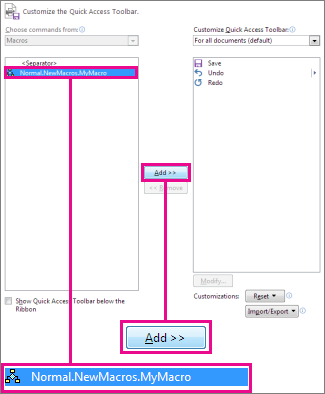
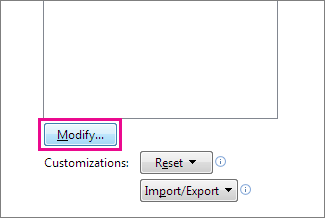
- Click Modify.
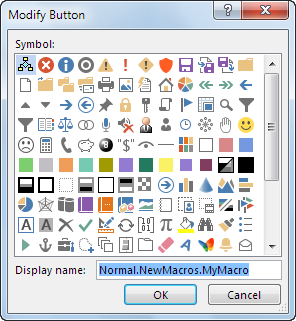
- Choose a button image, type the name you want, and click OK twice.
- Now it’s time to record the steps. Click the commands or press the keys for each step in the task. Word records your clicks and keystrokes.Note: Use the keyboard to select text while you’re recording your macro. Macros don’t record selections made with a mouse.
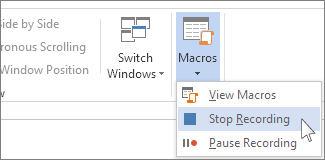
- To stop recording, click View > Macros > Stop Recording.
The button for your macro appears on the Quick Access Toolbar.

To run the macro, click the button.
Record a macro with a keyboard shortcut
- Click View > Macros > Record Macro.
- Type a name for the macro.
- To use this macro in any new documents you make, be sure the Store macro in box says All Documents (Normal.dotm).
- To run your macro when you press a keyboard shortcut, click Keyboard.
- Type a combination of keys in the Press new shortcut key box.
- Check to see whether that combination’s already assigned to something else. If it's already assigned, try a different combination.
- To use this keyboard shortcut in any new documents you make, be sure the Save changes in box says Normal.dotm.
- Click Assign.
- Now it’s time to record the steps. Click the commands or press the keys for each step in the task. Word records your clicks and keystrokes.Note: Use the keyboard to select text while you’re recording your macro. Macros don’t record selections made with a mouse.
- To stop recording, click View > Macros > Stop Recording.
To run the macro, press the keyboard shortcut keys.
Run a macro
To run a macro, click the button on the Quick Access Toolbar, press the keyboard shortcut, or you can run the macro from the Macros list.
- Click View > Macros > View Macros.
- In the list under Macro name, click the macro you want to run.
- Click Run
- Make a macro available in all documentsTo make a macro from one document available in all new documents, add it to the Normal.dotm template.
- Open the document that contains the macro.
- Click View > Macros > View Macros.
- Click Organizer.

- Click the macro you want to add to the Normal.dotm template, and click Copy.
- Add a macro button to the ribbon
- Click File > Options > Customize Ribbon.
- Under Choose commands from, click Macros.
- Click the macro you want.
- Under Customize the ribbon, click the tab and custom group where you want to add the macro.
If you don't have a custom group, click New Group. Then click Rename and type a name for your custom group.- Click Add.
- Click Rename to choose an image for the macro and type the name you want.
- Click OK twice.